Run A/B tests with Storyblok and Pagent
 Abdel •
 Small changes, like adjusting button text, can significantly impact your sales. With Storyblok’s integration with Pagent, testing these variations becomes effortless.
This tutorial will guide you through setting up your space, obtaining the necessary resources from Pagent, and seamlessly integrating everything into a NextJS application.
Before we begin, we must first understand what pagent does differently from a traditional A/B testing tool:
An A/B test contains variations of the same element. Traditionally you would have to create these variations manually, but with Pagent, generating and serving these variations is automatically handled. You can then analyze the data to determine which variation performs best and optimize your content accordingly.
Let’s get started!
Configuring the Storyblok space Structure
First, we need to set up our Storyblok space. A Storyblok subscription (Business or Enterprise) is required to do so. Start by installing the Pagent app into your Storyblok space.
In your Storyblok space, create a new content type called pagent. This content type will contain the following fields:
- Body: a Blocks field that will hold the contents of the page.
- Pagent: a Plugin field with the custom type pagent to integrate with Pagent.
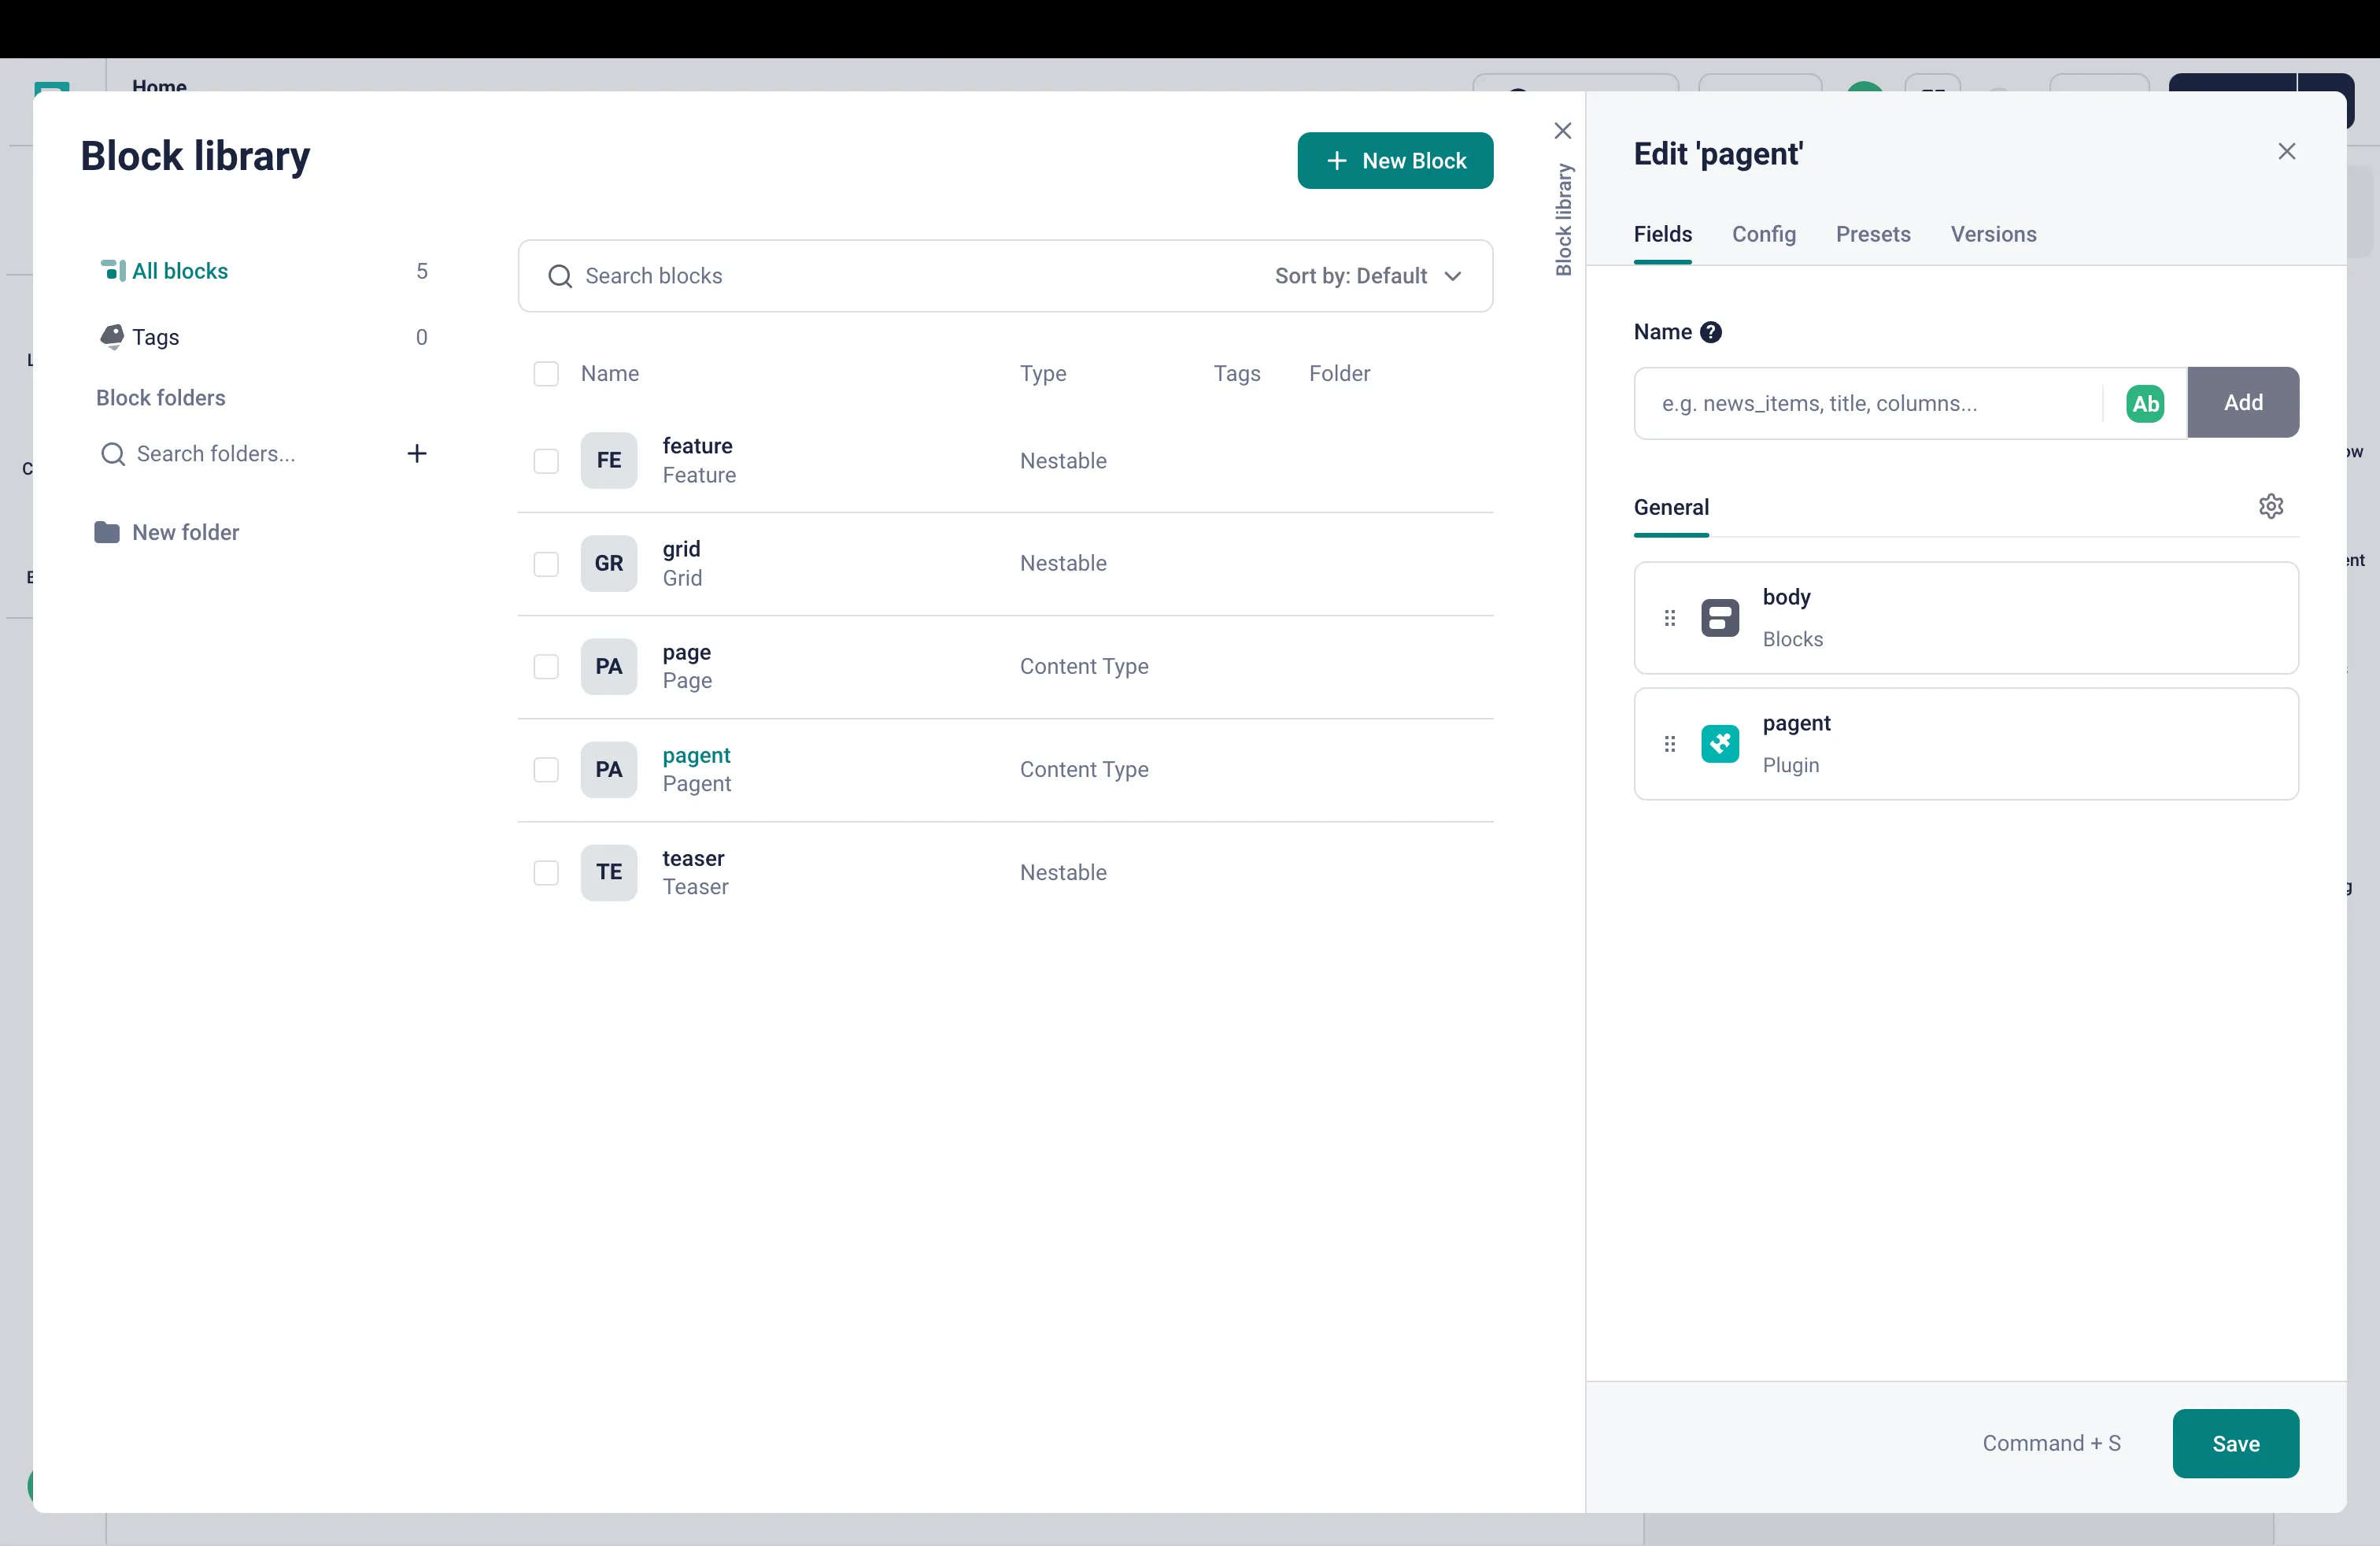 Figure 1:
Storyblok space structure
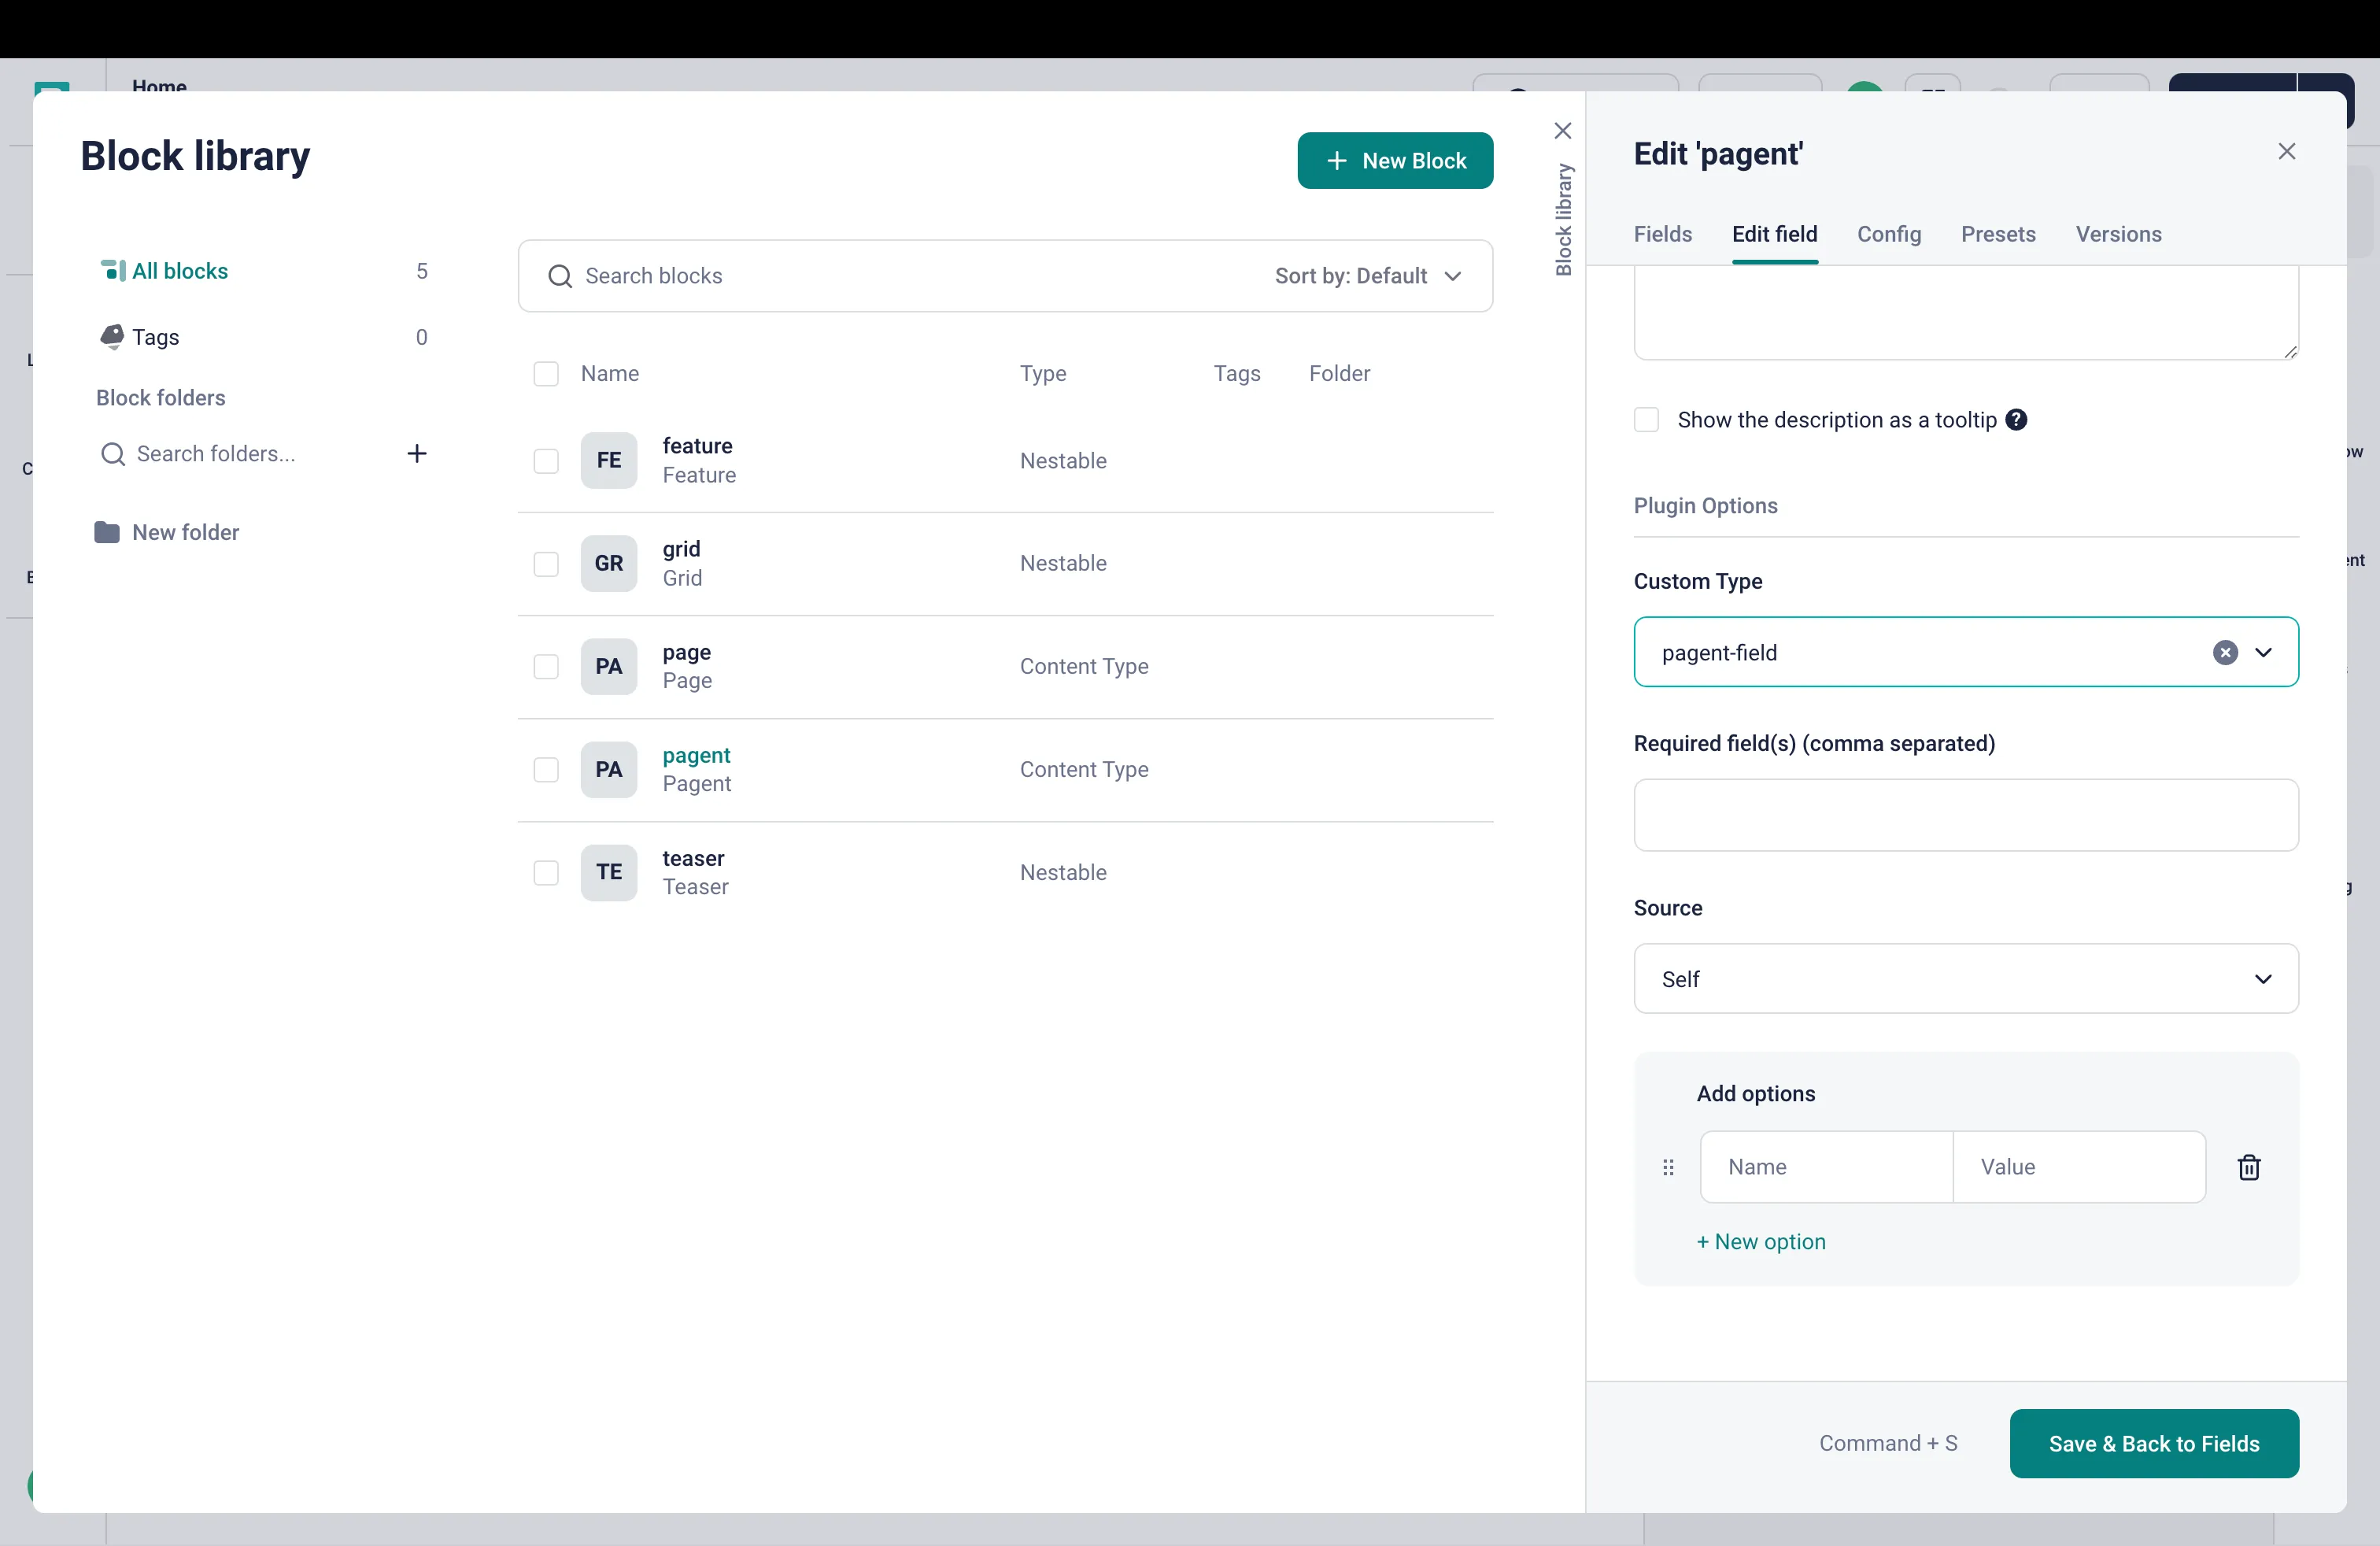 Figure 2: pagent
custom field
Next time you create a new Story, you should use the pagent content type to enable Pagent integration.
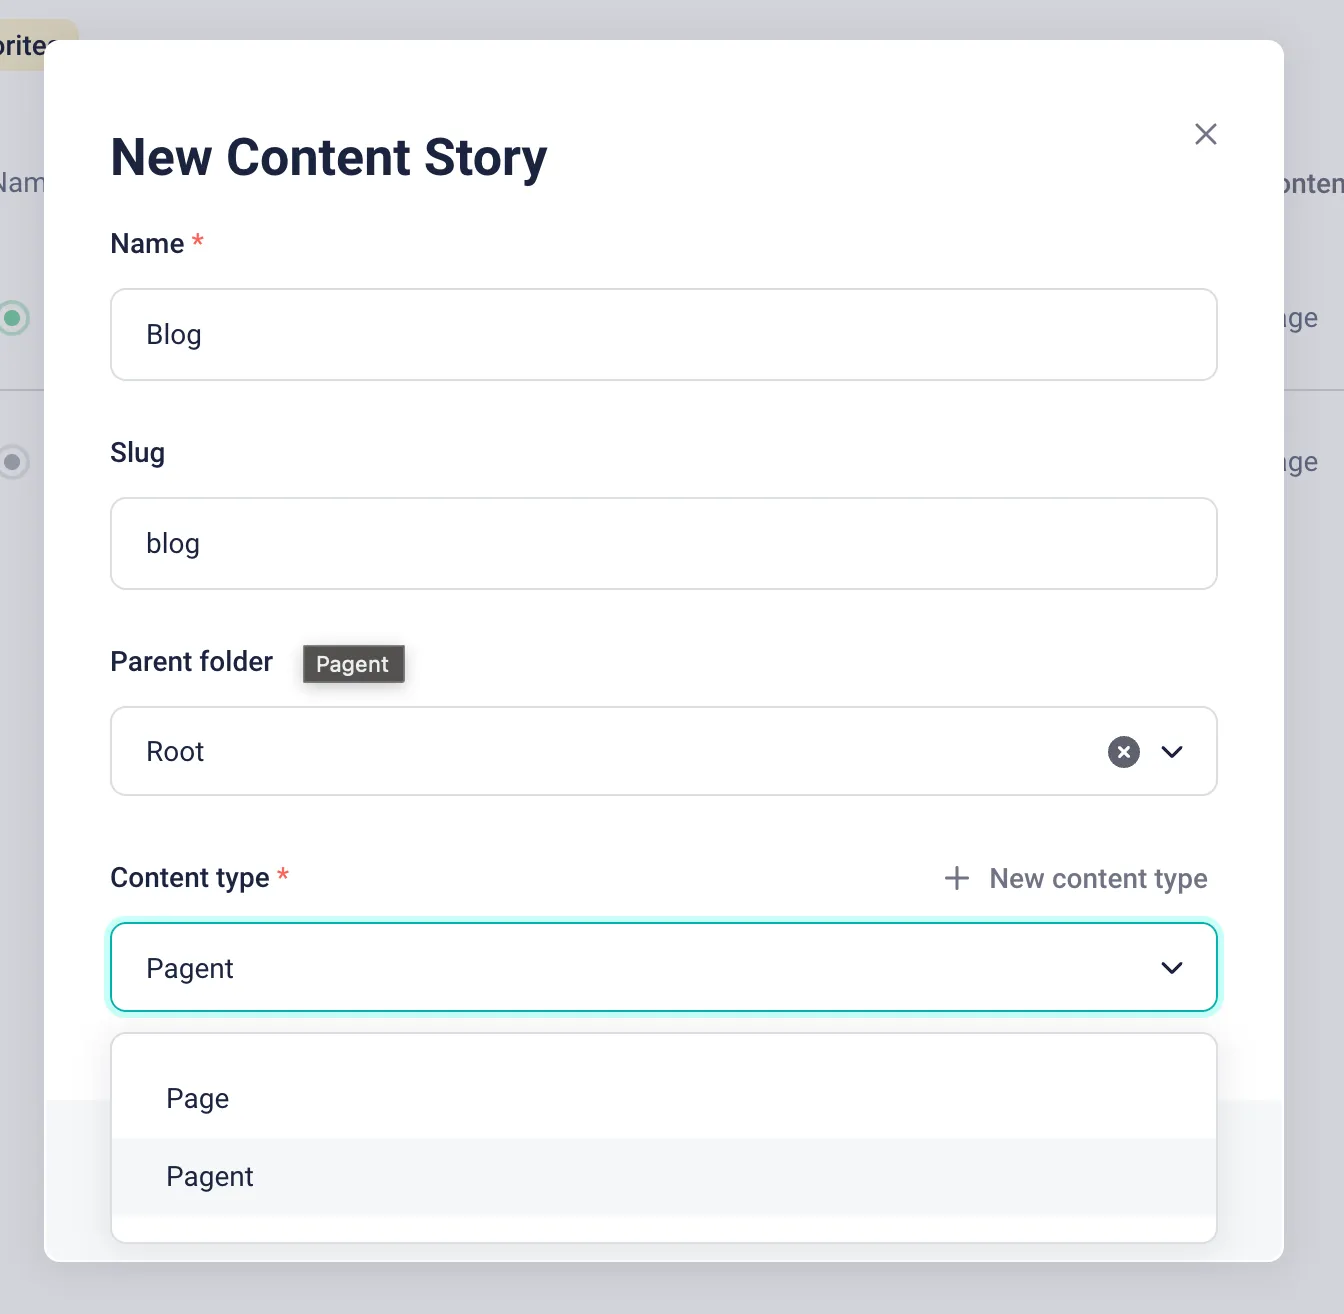 Figure 3: Create new
story
PS: These changes can also be made to the page content type to more easily integrate with your existing content and reduce the number of steps required for the setup. Just add the pagent field to the page content type.
Setting up Pagent
Setting up a test in Pagent is straightforward. First, we create a new pagent by entering the website domain we want to optimize.
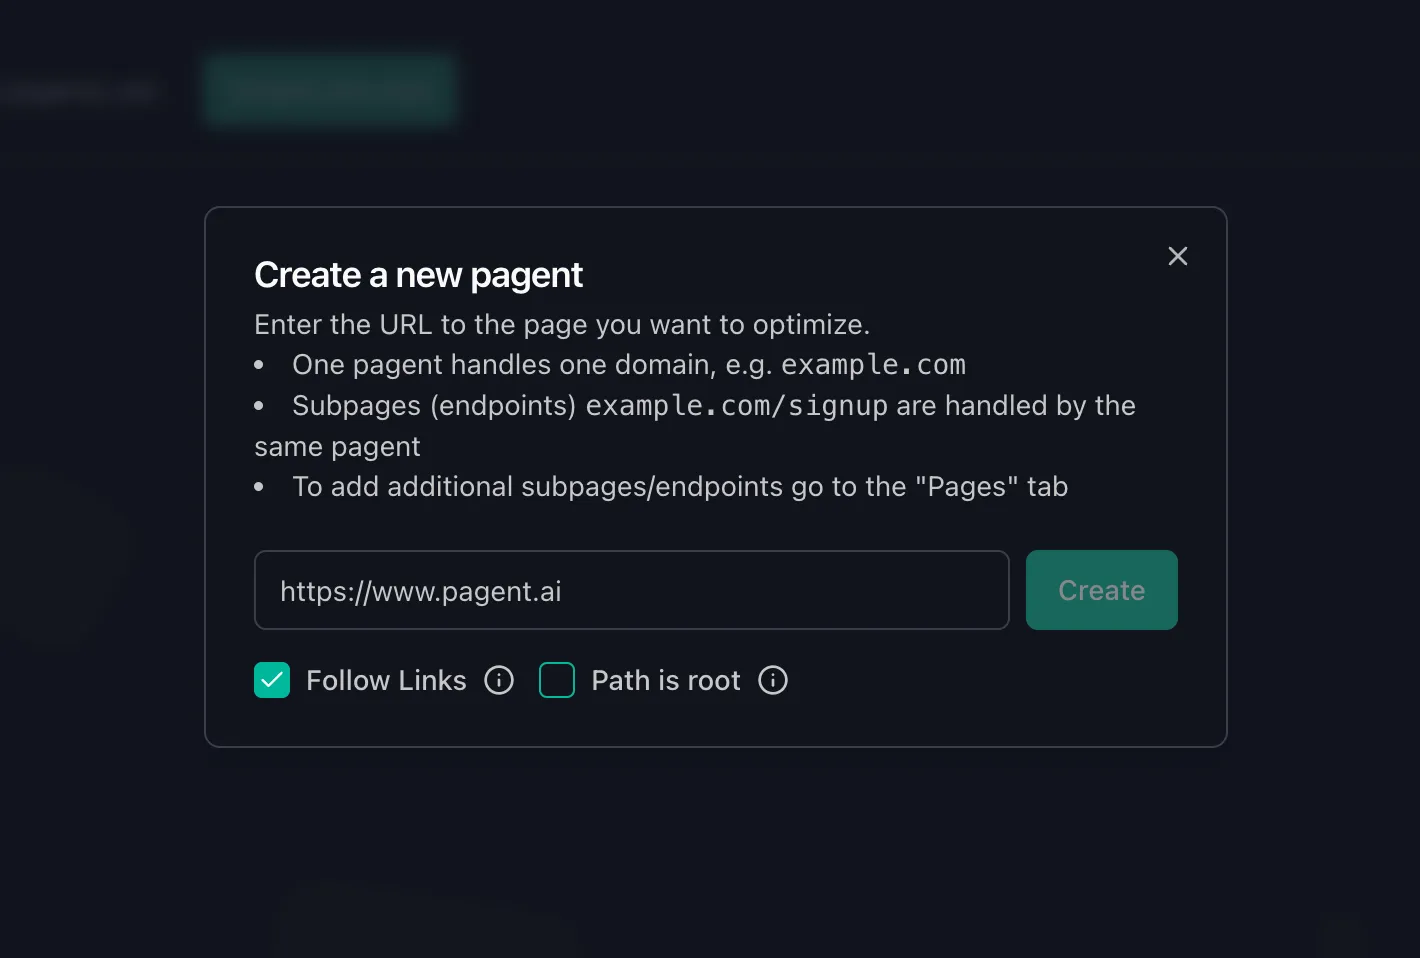 Figure 4: Create new pagent
The onboarding process will guide you through the initial setup, including setting up a strategy, defining the goal, and SEO keywords. Our platform will then generate initial variations based on high-performing websites and previous optimizations. Once in the dashboard, click on Open test.
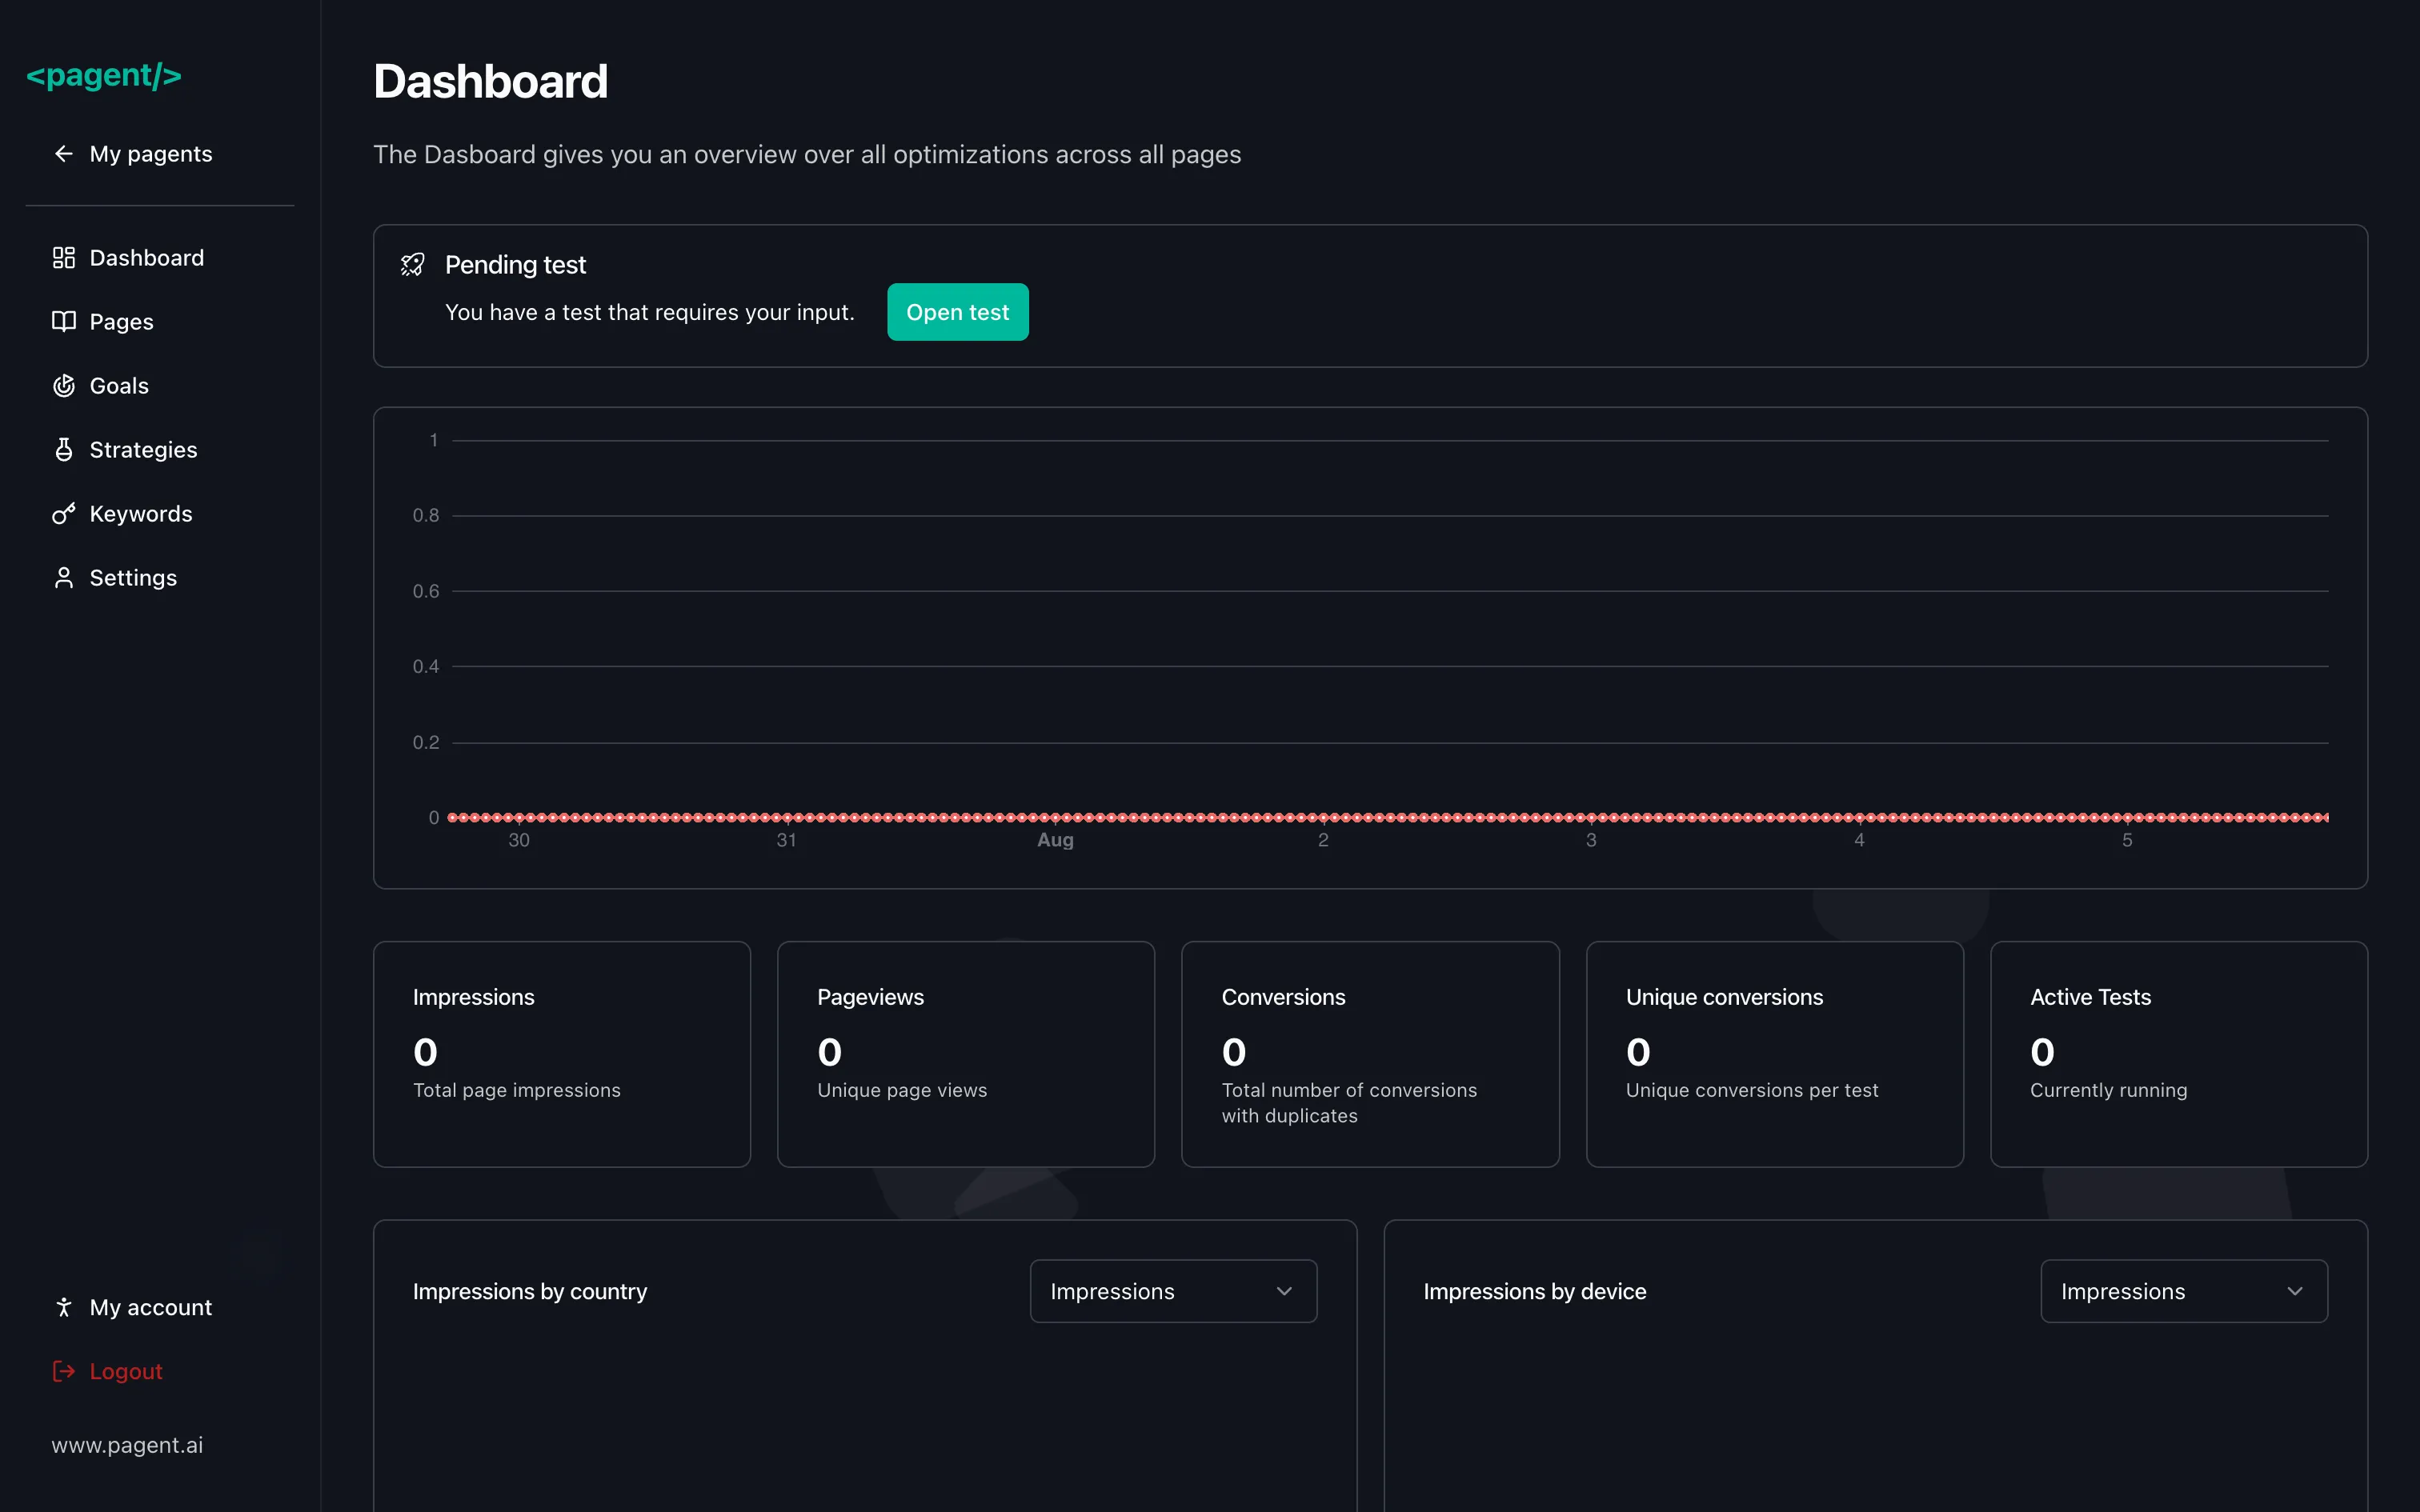 Figure 5: Dashboard
In the test editor, you can create new variations, adjust the existing ones, and vote for or against changes. Once you are satisfied with the variations, click on Continue.
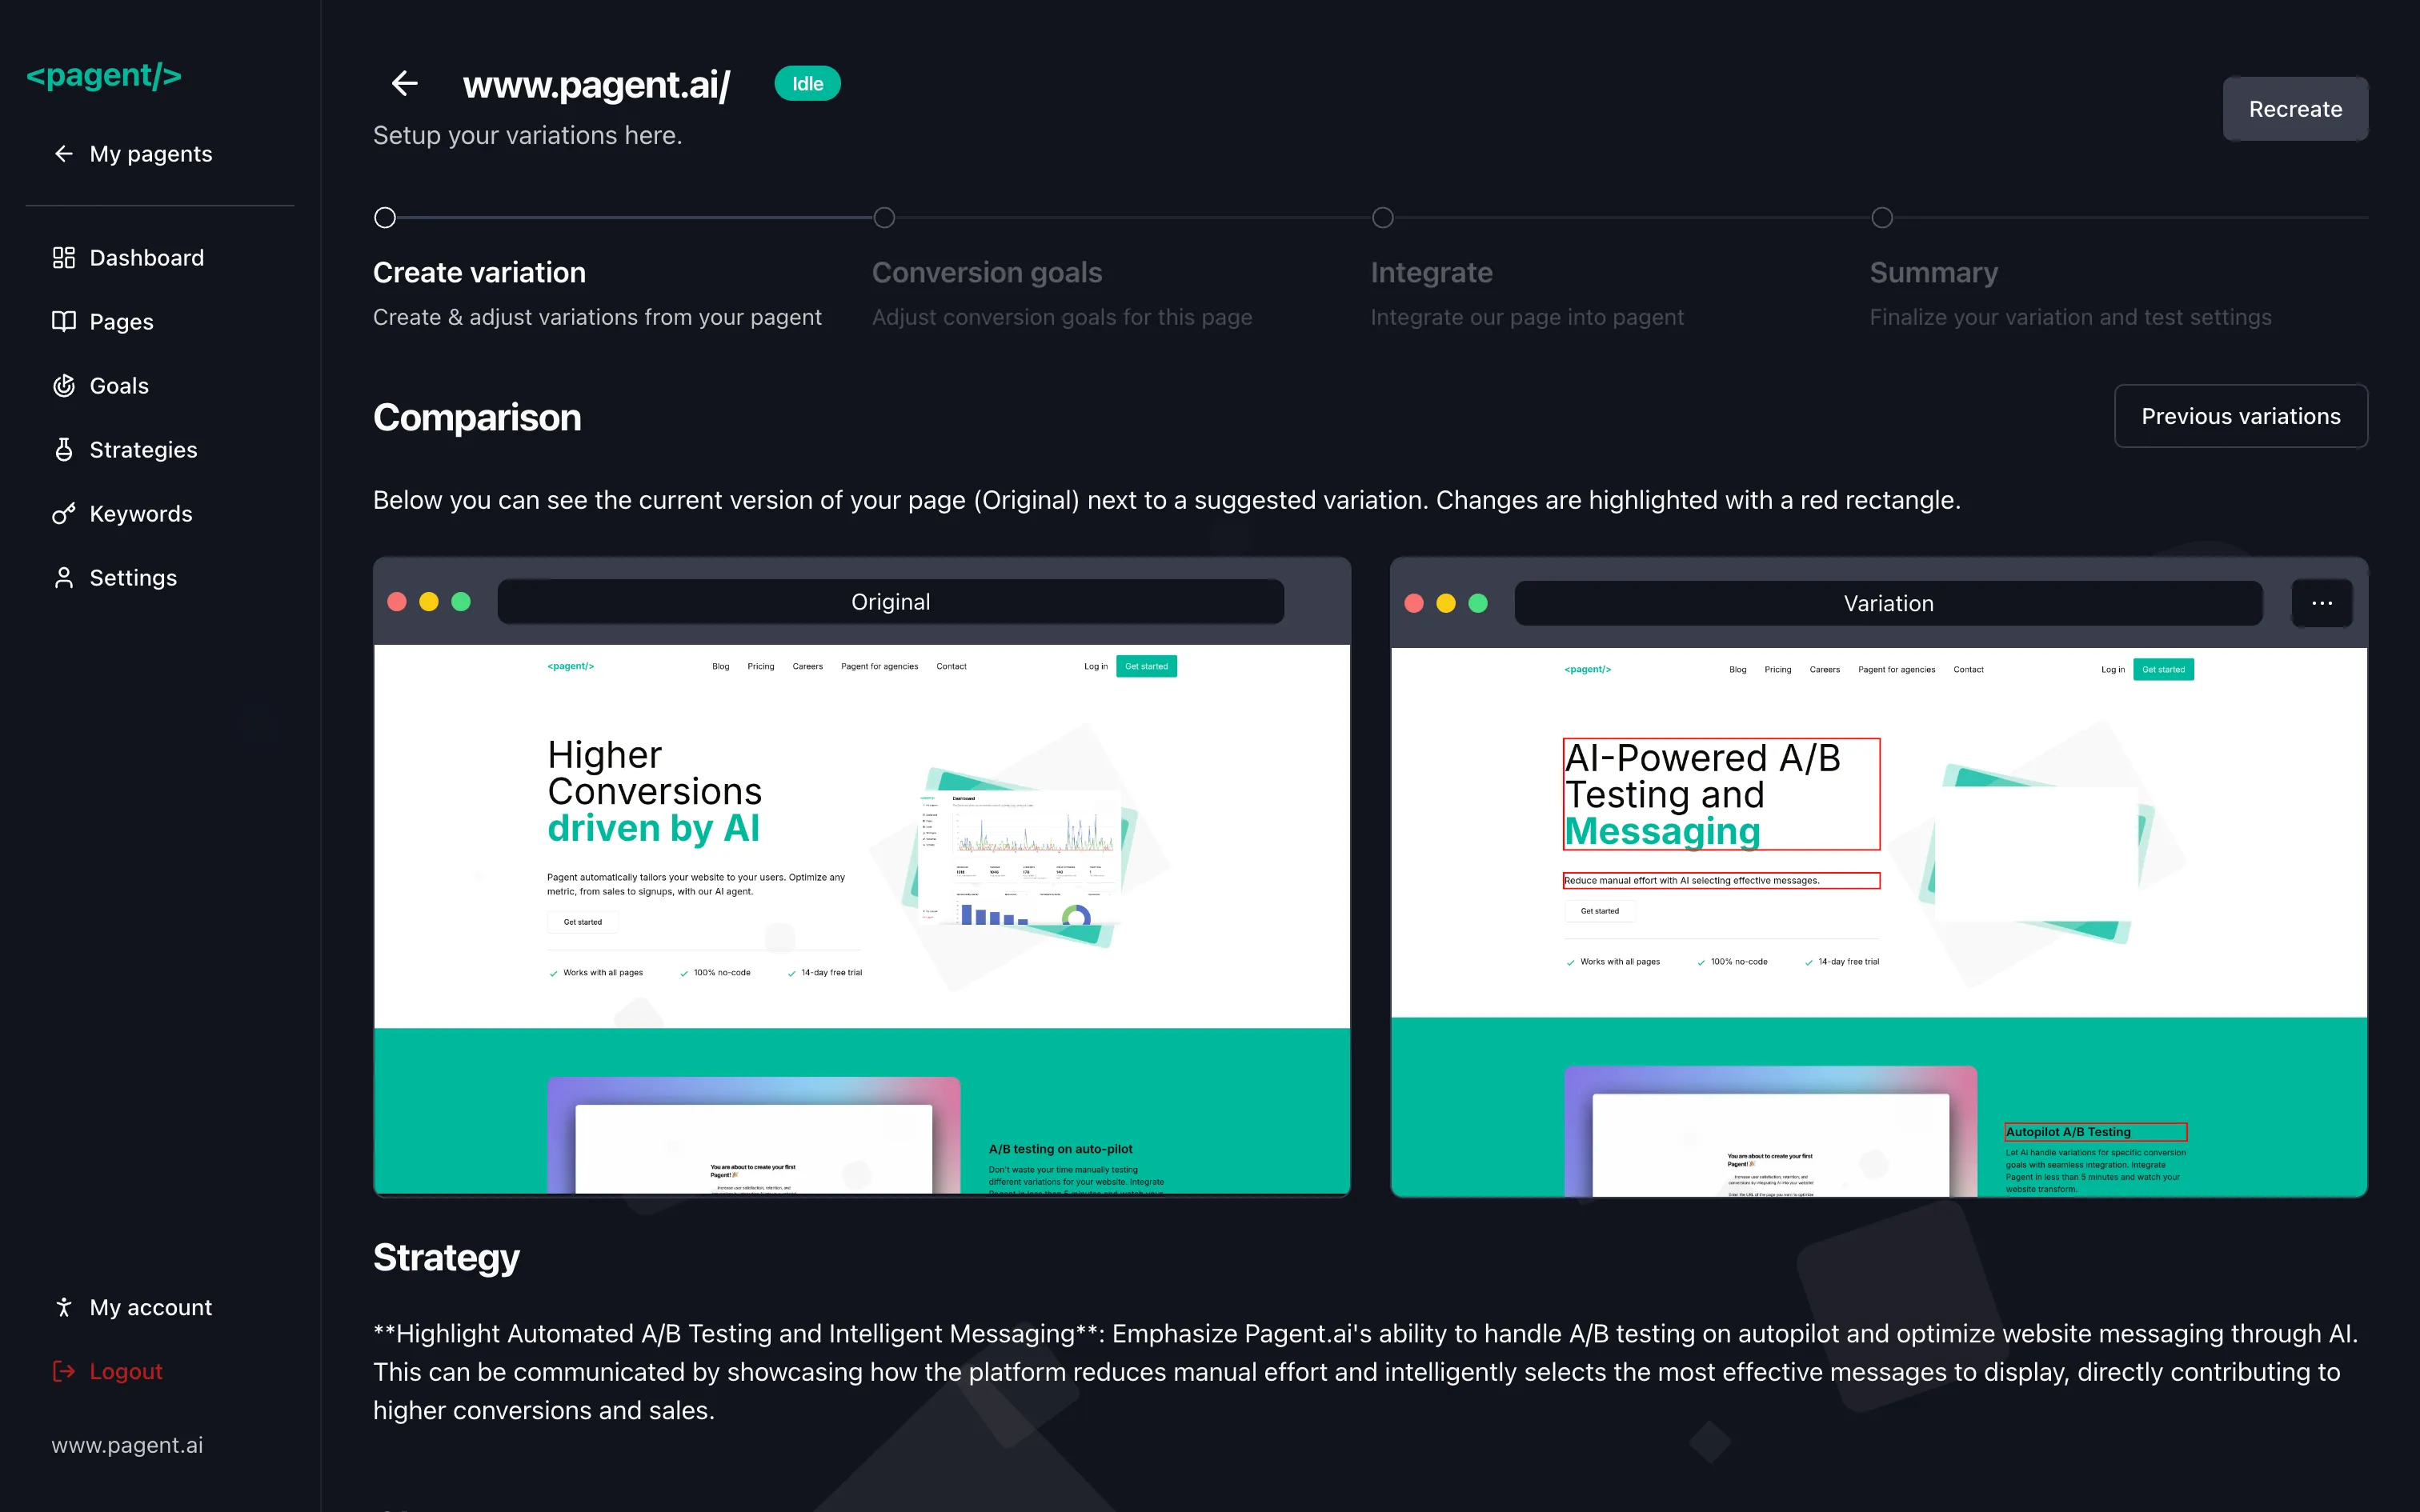 Figure 6: Test editor
The next page will let you select elements that count as conversions. You can select multiple elements. Once you are done, click on Continue. You will be given a JavaScript snippet to integrate into your website. Copy the data-client-key value from the snippet.
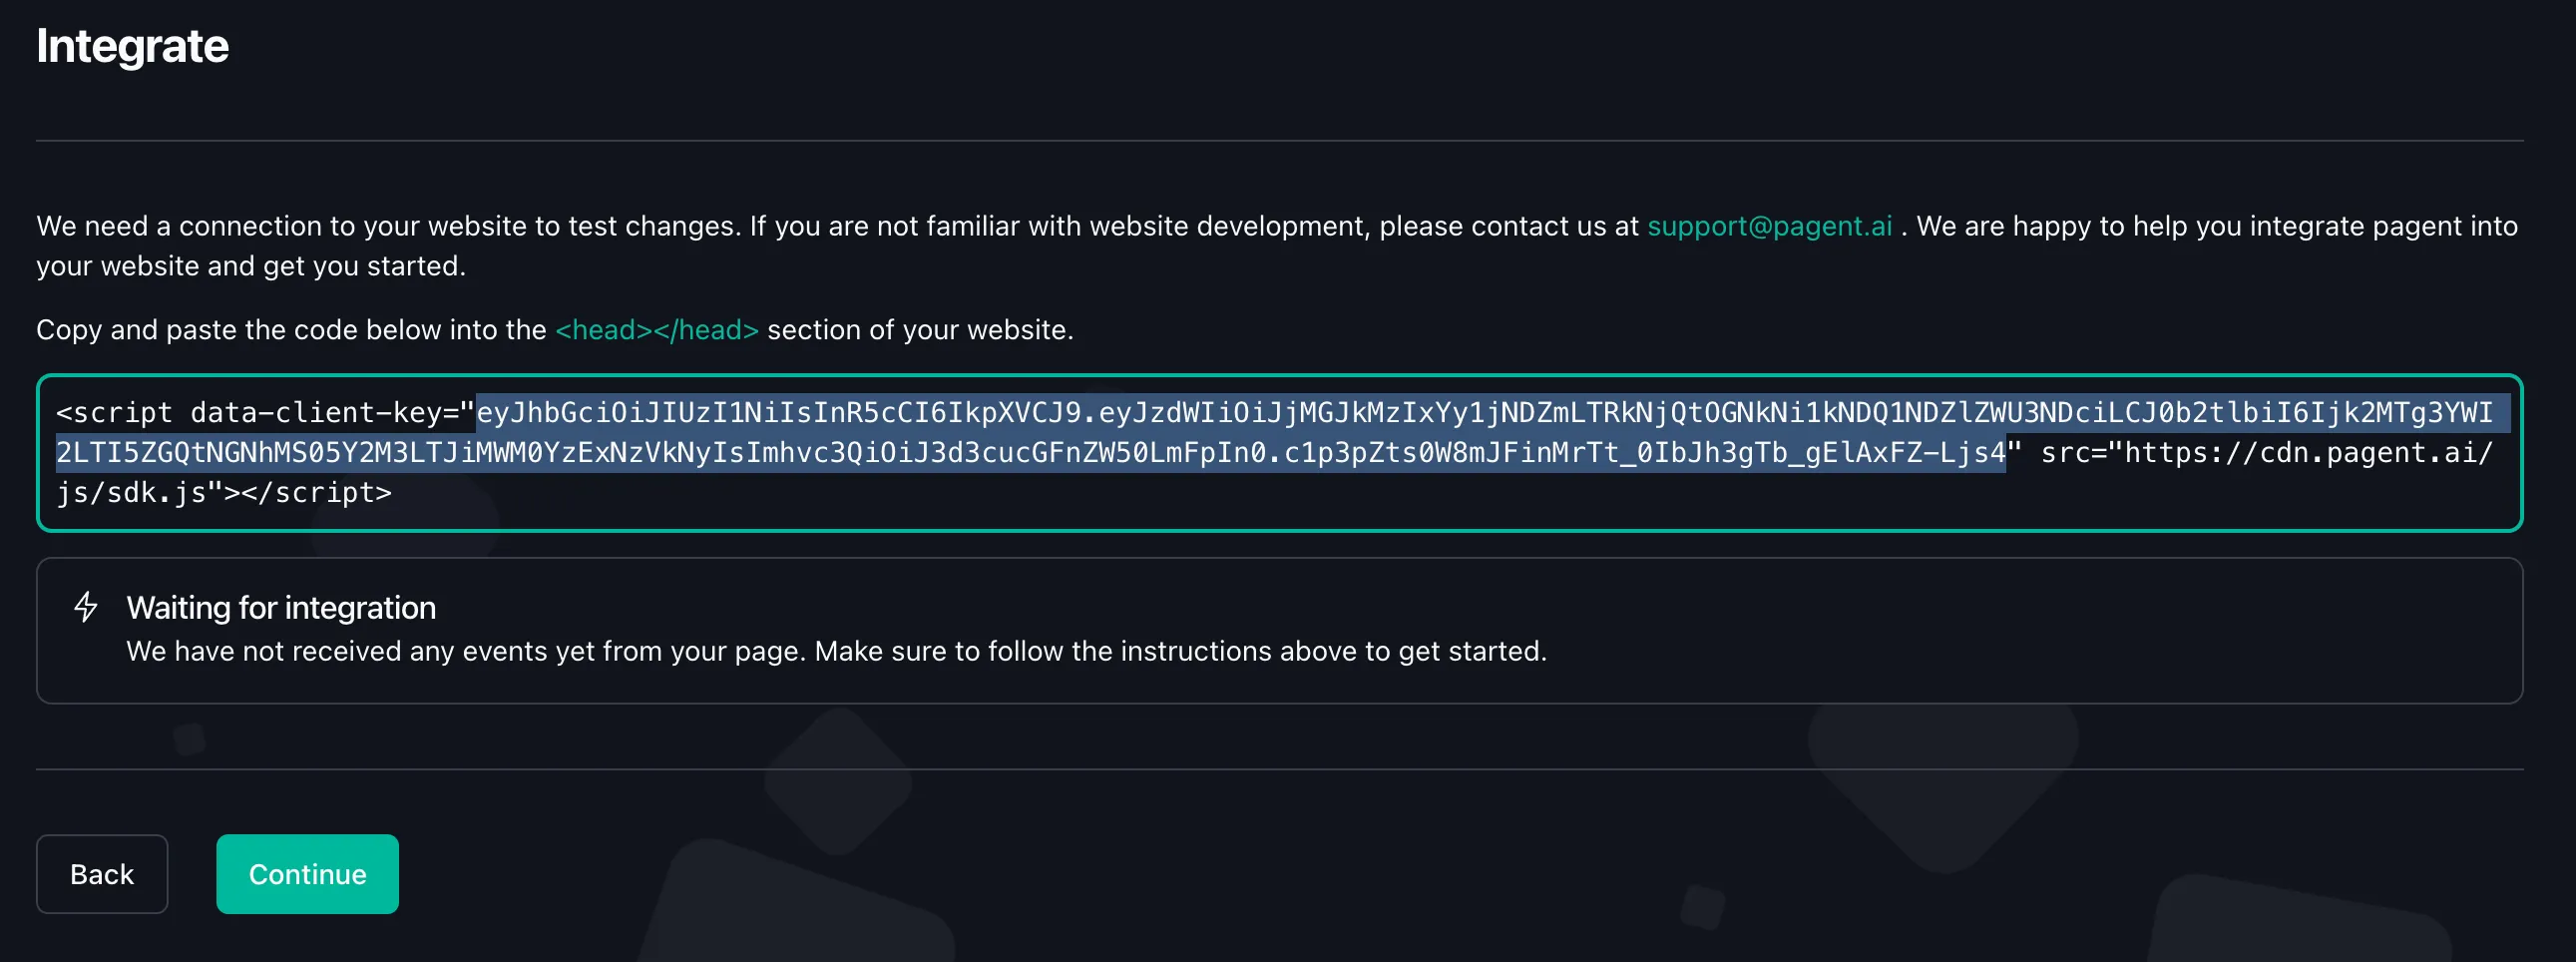 Figure 7: Code Snippet
Back in Storyblok, in the visual editor, select the pagent component and paste the data-client-key value into the JWT field.
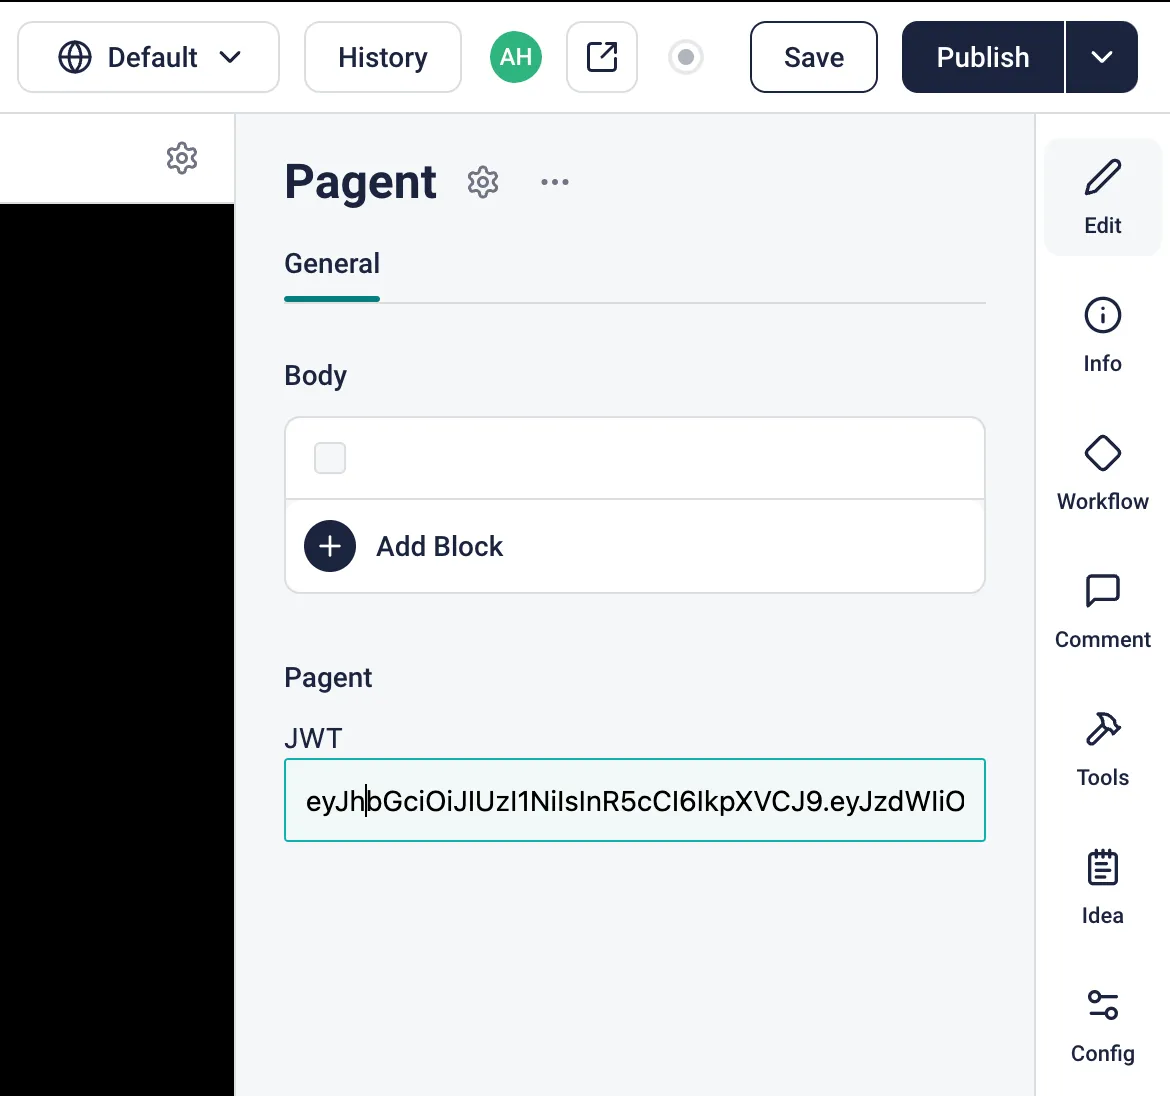 Figure 8: Pagent
component
Rendering Content in NextJS
Having set up the Storyblok space definitions and the pagent test, we can now move to rendering the content in our NextJS application. You can either follow along with the tutorial or grab the code from the GitHub repository.
If you’re starting from scratch, you can follow Storyblok’s NextJS tutorial to set up your project.
Once you have your project set up, create a new file called pagent.js in the components folder. This file will contain the logic to render the A/B test variations.
import { StoryblokComponent } from "@storyblok/react";
import Head from "next/head";

const Pagent = ({ blok }) => {
    return (
        <main className="text-center mt-4">
            <Head>
                <script
                    data-client-key={blok.config.jwt}
                    src="https://cdn.pagent.ai/js/sdk.js"
                />
            </Head>
            {blok.body.map((nestedBlok) => (
                <StoryblokComponent blok={nestedBlok} key={nestedBlok._uid} />
            ))}
        </main>
    );
};

export default Pagent;
Then, in your pages/_app.js file, import the Page component and add it to the components object. It should look something like this:
import "../styles/globals.css";
import { storyblokInit, apiPlugin } from "@storyblok/react";
import Feature from "../components/Feature";
import Grid from "../components/Grid";
import Page from "../components/Page";
import Teaser from "../components/Teaser";
// Added Pagent import
import Pagent from "../components/Pagent";

const components = {
    feature: Feature,
    grid: Grid,
    teaser: Teaser,
    page: Page,
    // Added Pagent component
    pagent: Pagent,
};

storyblokInit({
    accessToken: "YOUR_PREVIEW_TOKEN",
    use: [apiPlugin],
    components,
    apiOptions: {
        region: "",
    },
});

function MyApp({ Component, pageProps }) {
    return <Component {...pageProps} />;
}

export default MyApp;
And you are good to go! You can now create and overseer test variations in Pagent, and they will be automatically served to your users.
Conclusion
With Storyblok and Pagent, running A/B tests has never been easier. By following this guide, you can quickly set up your space, integrate Pagent, and start testing variations on your website. This will help you optimize your content and improve your user experience, leading to increased engagement and conversions. Start your A/B testing journey today and see the difference it makes!